As an SQL developer, I was required to modify the existing table structure and alter a column to allow null values. In this article, I will walk you through multiple ways to alter table columns to allow NULL in SQL Server with real-world scenarios.
Approach-1: Using the ALTER TABLE statement
This is the primary and simple approach to do this task.
Syntax
ALTER TABLE table_name
ALTER COLUMN column_name data_type NULL;
Real-World Example
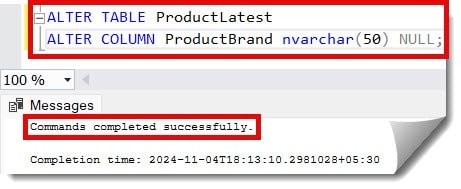
In the example below, ProductLatest is the table name, and ProductBrand is the column name. I am trying to make it null.
ALTER TABLE ProductLatest
ALTER COLUMN ProductBrand nvarchar(50) NULL;
After executing the above script, I got the expected output, as shown below.
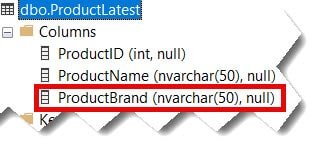
You can see in the screenshot below that the ProductBrand column is now allowed a NULL value.
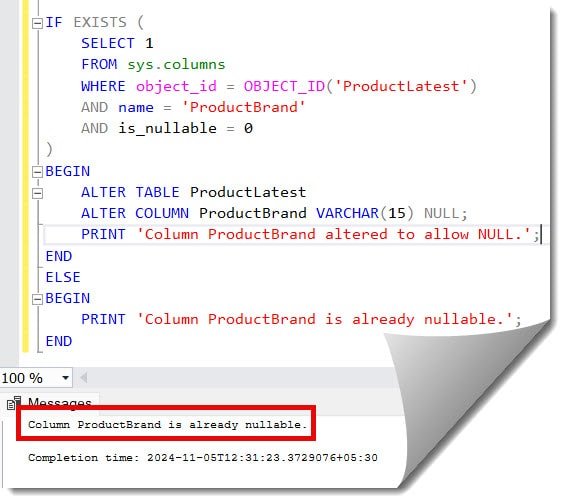
You can also use an SQL script to check if the column is already nullable; if not, alter it to allow null. Refer to the query below.
IF EXISTS (
    SELECT 1
    FROM sys.columns
    WHERE object_id = OBJECT_ID('ProductLatest')
    AND name = 'ProductBrand'
    AND is_nullable = 0
)
BEGIN
    ALTER TABLE ProductLatest
    ALTER COLUMN ProductBrand VARCHAR(15) NULL;
    PRINT 'Column ProductBrand altered to allow NULL.';
END
ELSE
BEGIN
    PRINT 'Column ProductBrand is already nullable.';
END
After executing the above query, I got the expected output below.
Check out How to Find Table Dependencies in SQL Server
Approach-2: Using SQL Server Management Studio (SSMS)
Follow the below steps
1. Connect to the SQL Server Management Studio (SSMS).
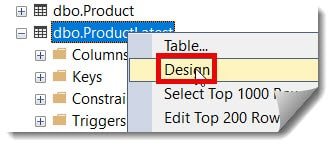
2. Expand the table node, Right-click on the table name, then select the Design option, as shown in the screenshot below.
3. Ensure that you select the Allow Nulls check box and then click the Save button to save the changes, as shown in the screenshot below.
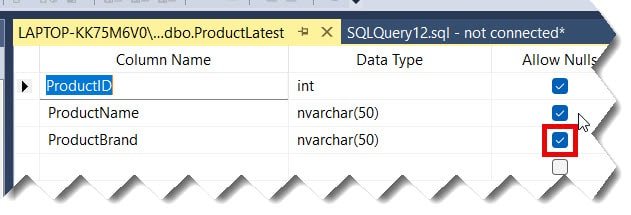
Note: If the column already has data and you’re trying to change it from NOT NULL to NULL, you won’t face any issues. However, if you’re doing the reverse, you must handle existing NULL values first.
Check out: How To View Table In SQL Server Management Studio
Approach-3: Updating the Columns with Dependencies
If the column is part of an index or has any other dependencies, you must remove these first before altering the column. Let’s see an example.
1. First, Drop the index using the below query.
DROP INDEX IX_ProductLatest_ProductBrand ON ProductLatest;The query executed successfully, as shown below.

2. Now, alter the column to allow the null value using the below SQL query.
ALTER TABLE ProductLatest
ALTER COLUMN ProductBrand nvarchar(50) NULL;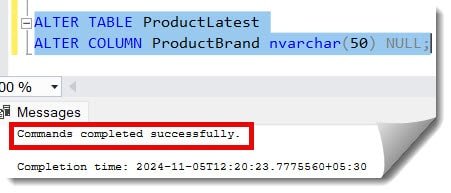
3. Finally, recreate the index using the below query. It was done successfully, as shown in the screenshot below.
CREATE INDEX IX_ProductLatest_ProductBrand ON ProductLatest(ProductBrand);
Conclusion
Using the approaches with the real-time examples mentioned in this article, altering a table column to allow NULL in SQL Server is relatively easy.
You may also like following the articles below.
- How To Copy Table Schema In SQL Server
- How To Create A Schema In SQL Server
- How to Get Table Row Count in SQL Server
- How To Save Query Results As Table In SQL Server

Grey is a highly experienced and certified database expert with over 15 years of hands-on experience in designing, implementing, and managing complex database systems. Currently employed at WEX, USA, Grey has established a reputation as a go-to resource for all things related to database management, particularly in Microsoft SQL Server and Oracle environments. He is a Certified Microsoft SQL Server Professional (MCSE: Data Management and Analytics) and Oracle Certified Professional (OCP), with Extensive database performance tuning and optimization knowledge and a proven track record in designing and implementing high-availability database solutions.