Last month, my client required me to export table data into a CSV file in an SQL Server. In this article, I will walk you through all the methods.
Method-1: Using SQL Server Management Studio (SSMS)
Follow the below steps.
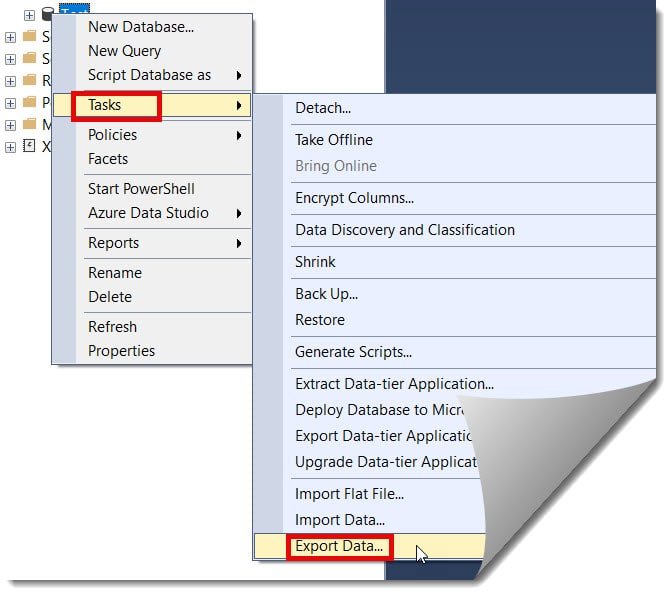
1. Right-click on the database name your table belongs to, choose Tasks, and then select the Export Data option, as shown in the screenshot below.
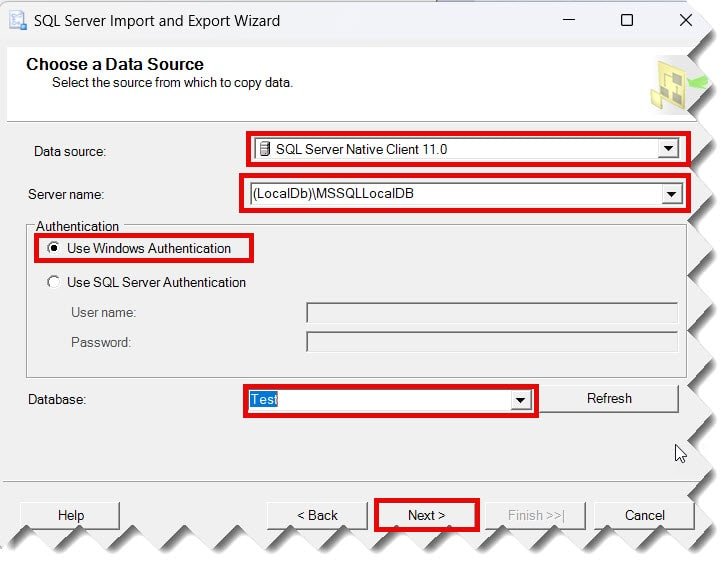
2. Provide the below details.
- Data Source: Select the SQL Server Native Client 11.0 as the data source.
- Server name: Select the server name.
- Authentication: Select the Windows Authentication or SQL Server Authentication based on yours.
- Database: Choose the Database your table belongs to.
Then, click on the Next button.
Note: Ensure you have installed the SQL Server Native Client 11.0 in your system.
Check out How To Check If CDC Is Enabled On A Table In SQL Server
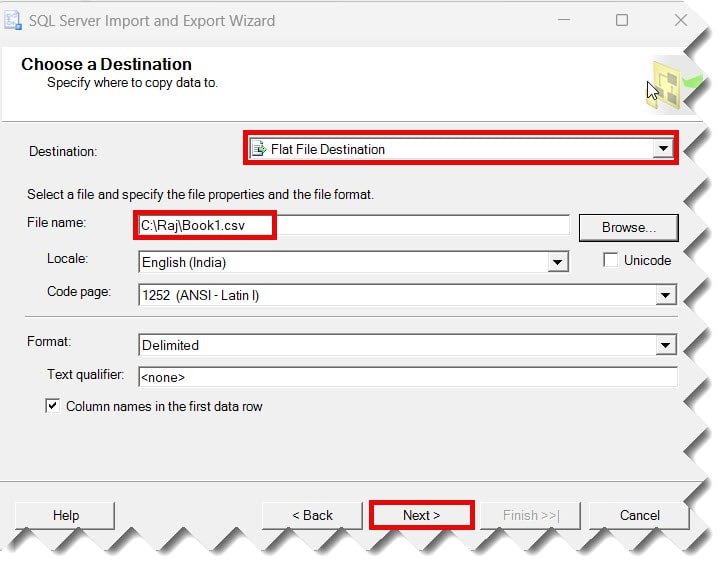
3. Choose the destination as a flat file destination, and choose the CSV file path from your PC.
Keep all other options as they are, then click the Next button.
Note: You can create an empty csv file on your PC.
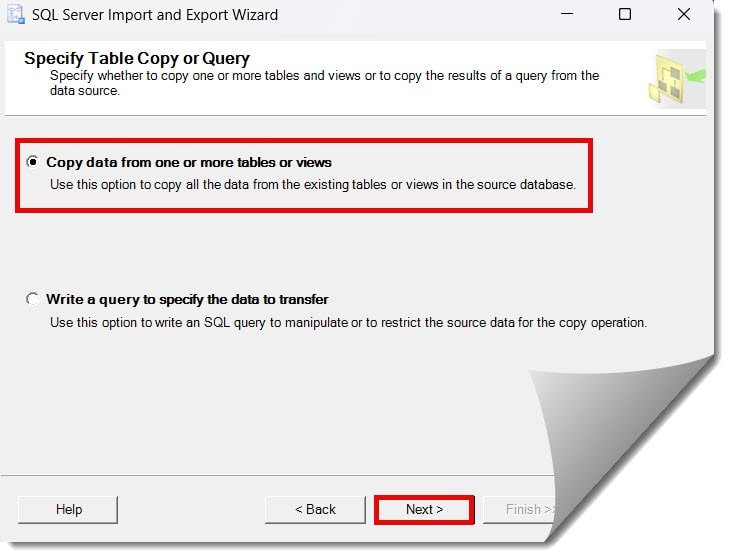
4. Choose the Copy data from one or more tables or views option and click the Next button, as shown in the screenshot below.
5. Select the table name and click on the Next button.
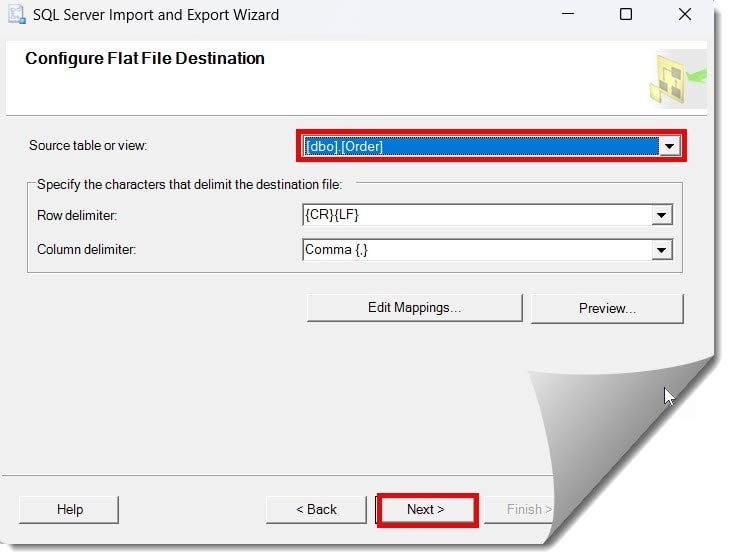
6. Choose the Run Immediately option and click the Next button.
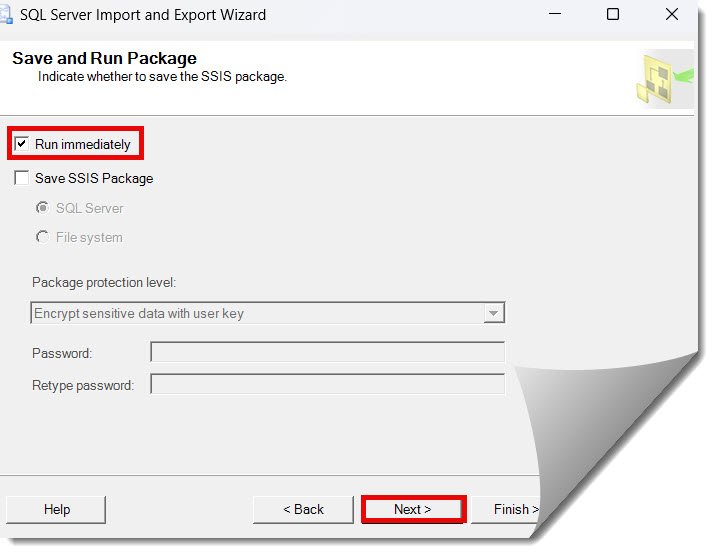
7. Click on the Finish button.
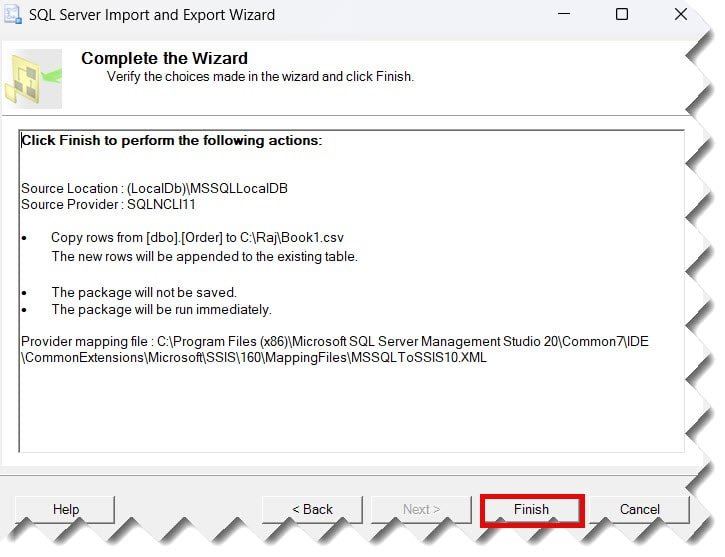
Check out: How To Check Table Description In SQL Server
The screenshot below shows that the execution was successful. Click on the Close button to close the pop-up.
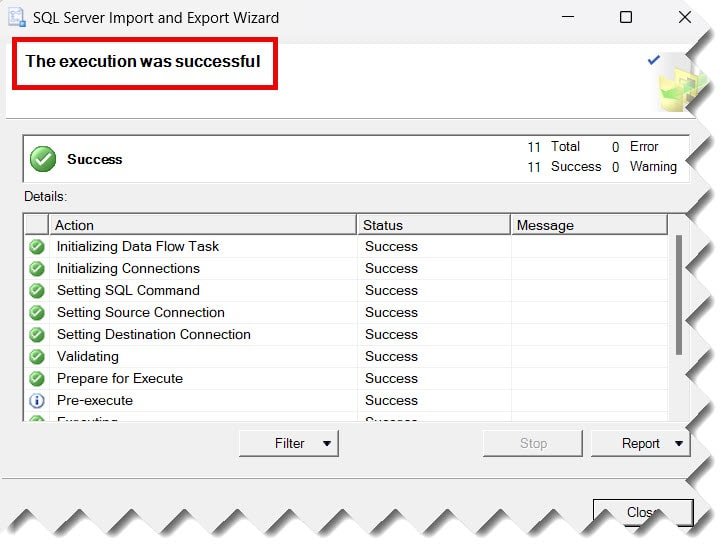
Now open the CSV file from your system. The data has been exported successfully, as you can see below.
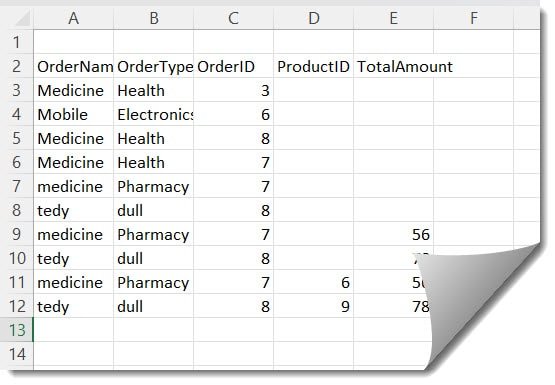
Method-2: Exporting the table with the Copy With Headers option from SSMS
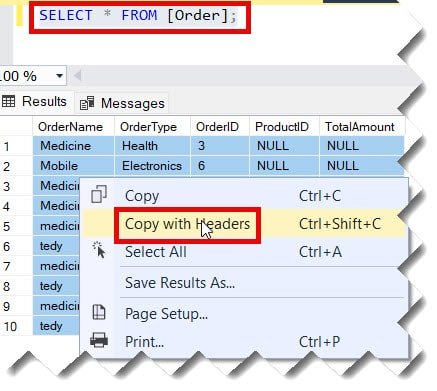
First, run the below select statement to get the data from the table.
SELECT * FROM [Order];After executing the query, Select the complete result –> Right-click and select the Copy with Headers option.
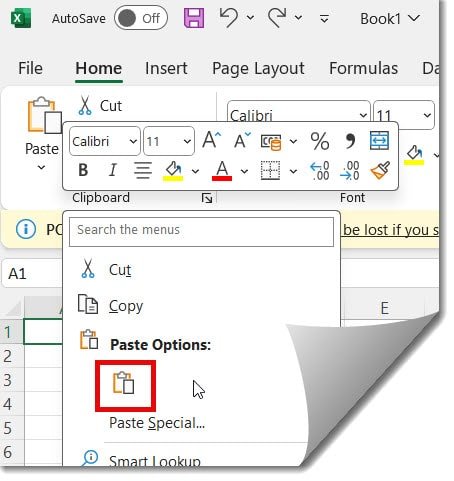
Open the empty csv file, right-click, and choose the paste option.
Check out: How To Rename The Table Name In SQL Server
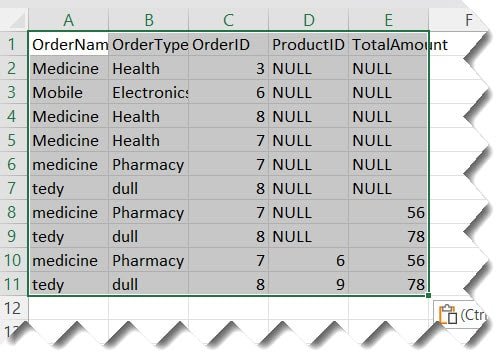
The complete data has been exported to the csv file, as shown in the screenshot below.
Method-3: Using PowerShell ISE
Follow the below steps
1. Open PowerShell ISE with Run As Administrator mode.
2. Now, you can run the below PowerShell command.
Invoke-Sqlcmd -Query "SELECT * from test.dbo.[Order];" -ServerInstance "(LocalDb)\MSSQLLocalDB" | Export-Csv -Path "C:\Raj\Book1.csv" -NoTypeInformationAfter executing the command, I got the below error.
” Invoke-Sqlcmd : The term ‘Invoke-Sqlcmd’ is not recognized as the name of a cmdlet “

To solve this issue, I ran the command below in PowerShell ISE to install the SQL Server module.
Install-Module -Name SqlServer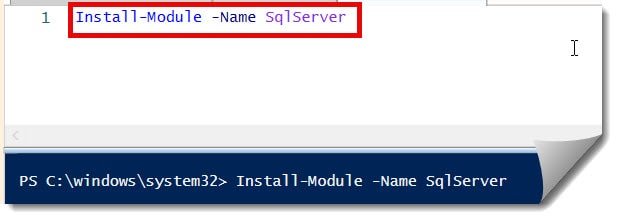
Now, I reran the below command.
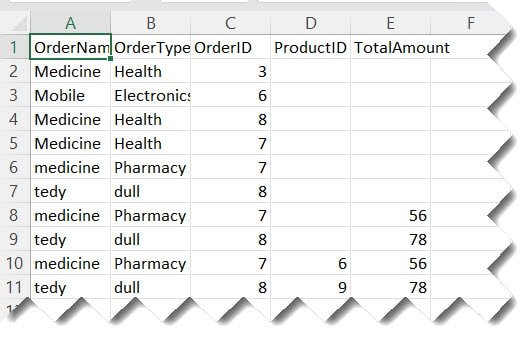
Invoke-Sqlcmd -Query "SELECT * from test.dbo.[Order];" -ServerInstance "(LocalDb)\MSSQLLocalDB" | Export-Csv -Path "C:\Raj\Book1.csv" -NoTypeInformationThis time, the command was executed successfully, and the table data was successfully exported to the CSV file, as shown in the screenshot below.

Conclusion
Exporting SQL Server tables to CSV is an essential skill for data developers. You can complete this task using SSMS, SQL scripting, or even PowerShell. You use the information mentioned in this article to achieve this based on your requirements.
You may also like following the articles below.
- How To Check User Permissions On Table In SQL Server
- How To Find Table With Column Name in SQL Server

Grey is a highly experienced and certified database expert with over 15 years of hands-on experience in designing, implementing, and managing complex database systems. Currently employed at WEX, USA, Grey has established a reputation as a go-to resource for all things related to database management, particularly in Microsoft SQL Server and Oracle environments. He is a Certified Microsoft SQL Server Professional (MCSE: Data Management and Analytics) and Oracle Certified Professional (OCP), with Extensive database performance tuning and optimization knowledge and a proven track record in designing and implementing high-availability database solutions.